Welcome to the first week of this journey with me! This week, our class had gone through a series of administrative work such as forming teams and setting down ground rules within the team. We also did a small activity which is creating a keychain using Fusion360 with our name on it to refresh our memory of what we did in our previous module, "Introduction to Chemical Product Design".
This is the keychain using the following steps that I have made on Fusion360 (Please click on the image to enlarge it for a better view):
Step 1: Create a 65mm x 25mm rectangular sketch

Step 2: Offset the rectangular sketch by 2mm

Step 3: Fillet the corners of the outer rectangular sketch by 5mm

Step 4: Create a construction line 7mm away from the shorter side of the rectangular sketch

Step 5: Create a circle of 5mm radius along the middle of the construction line

Step 6: Create a text onto the rectangular sketch. I chose to write my name using the Times New Roman Font.

Step 7: Extrude the base of the sketch by 3mm

Step 8: Extrude the border and text(my name) by 1.5mm

Step 8: On the extrude menu, select offset plane and offset the border and text by 3mm

Step 9: Hide the sketch

Learning Reflection:
This week, our class did mostly administrative work such as forming a group and making ground rules within the group. We also did a refresher of Fusion360 so that we would be warmed up for the module as this was our first lesson after a long holiday. Making the ground rules within the group was important because it prevents our group from facing conflicts and helps us to comply with one another. As I had forgotten how to use Fusion360, many mistakes were made during the refresher activity. However, it was very helpful and fun to me because I got to make my own keychain! Also, now I know what the basic features such as extruding, cutting and filleting do and how it can help me to create my own Fusion360 design again! This skill will be very useful to me in creating basic designs on Fusion360. That is all for this weeks' documentation. See you next week where we would learn how more about Laser Cutting!
Individual Assignment
After the tutorial lesson, we were tasked with an individual assignment which is to create a handphone stand using parametrics. I started researching about handphone stands online to gain some inspiration. I decided that for my phone stand, I wanted it to be a basic design. Here are some pictures of the designing process (Click on the images to enlage it for a better view)!
For the start, this is the phone stand that had inspired me to make my design:

Firstly, I created the foundation of the sketch using 2 two-point rectangles with a width of 4mm.

Here is the user parameter that I used during the sketching. I named it thickness and used an expression of 4mm. This is so that I can change the thickness of the handphone stand easily when using materials of different thickness.

Next, I changed the angle of the phone stand to 72.0°such that it would be able to stand upright, and changed the width of the 2 two-pointed rectangles to the user parameter "thickness".

Next, I extruded the sketch into 2 bodies and cut them so that they are able to connect to one another


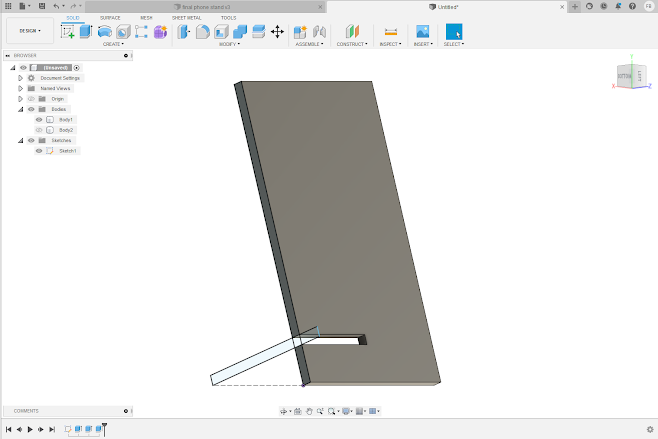

To verify that I made the connection of the 2 bodies and cut them properly, I moved the top body by 80mm. As it is verified, I am then able to save them into .dxf or .svg format so that I am able to import them into a laser cutter machine and laser cut it into the phone stand.

This is the end result of the handphone stand.

Learning Reflection
This week, our class had learnt about laser cutting. There are many laser cutter machines but during our class, we learnt specifically more about the CO2 laser cutter machine. There are several safety hazards when operating the CO2 laser cutter machine such as fires and fumes. Hence, this lesson has taught us how to operate the laser cutter machine safely. After the tutorial, we were tasked to make a phone stand using parametrics. It was a very fun individual assignment as I got to tinker with the features in Fusion360 and learn more about how to use them properly from watching YouTube videos. I learnt that parametrics help with design process such that we can change the dimensions of the design within seconds. This will be very useful with future lessons that require designing using Fusion360 or for my own use. I used to think that changing the dimensions of a design on Fusion360 takes too much time. Now I think that by using parametrics, it will surely speed up the designing process and make it easy for me. Also, laser cutting sometimes use materials with different thickness. Hence, I can change the user parameters to the right thickness easily for a press fit design. So next, I will make use of the parametrics feature for future uses in Fusion360. See you again next week!


No comments:
Post a Comment